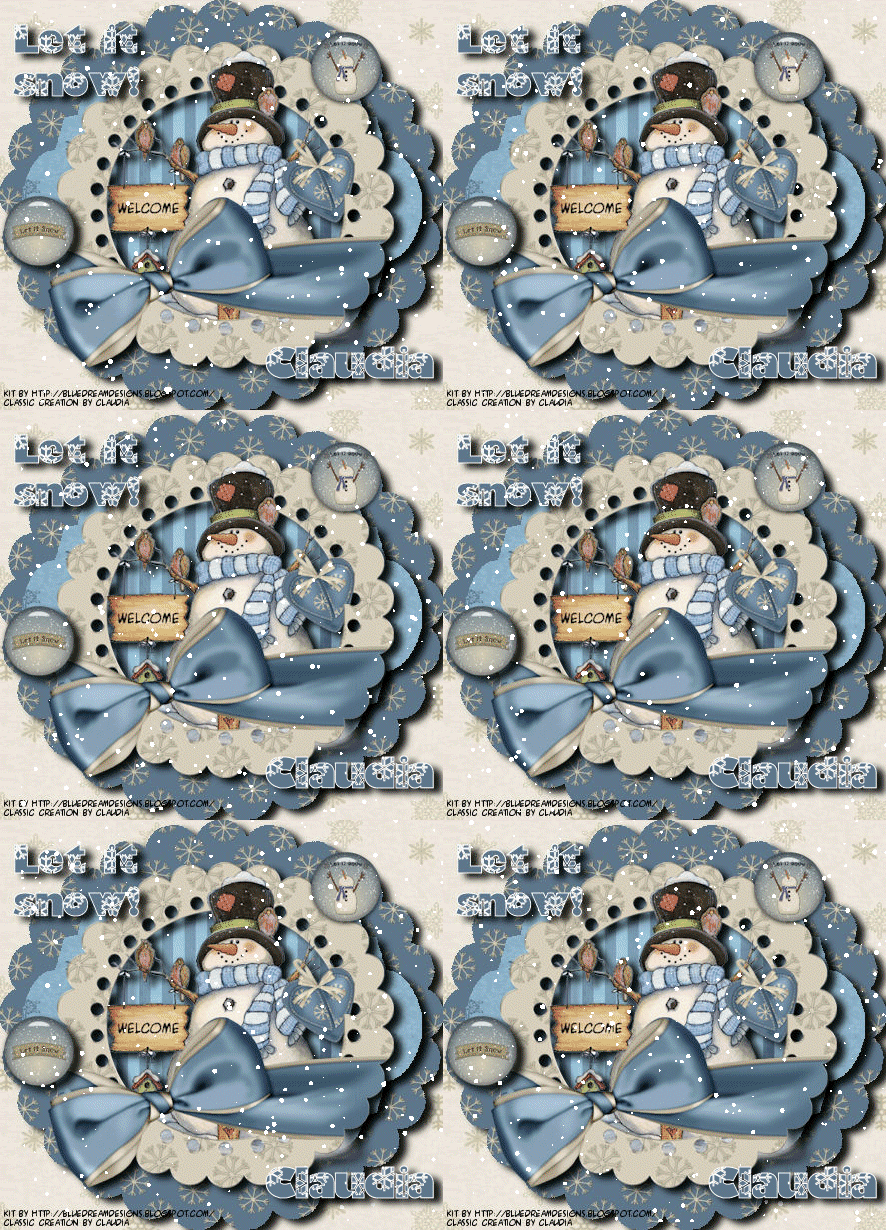
And I know some people are able to link to a tutorial off of their blog, but I don't know how to do that yet. If someone reading this wants to share that information with me, I would be so grateful!

Tut requires PSP and Animation Shop, and the following supplies:
Get the scrap kit from Blue Dream Designs, Winter Wonderland, download here: Winter Wonderland Scrap Kit
Template by Yvette (#48), download here: Yvette’s Template
Get my supplies, download here: My Supplies
Download and open supplies. Remember, you do not have to install the font, you only have to save it and then open it to your desktop and it will be available to use in PSP as long as you have it open.
Open template. Delete or X out the designer’s copyright information.
Select Background Layer. Layer—Promote Background Layer. Select—Select All. Chose a paper, I used Paper #6. Copy the paper, return to Template and Paste into Selection. Selections—Select None.
Select Shape 1 of your Template. Using your Magic Wand, click on the shape. Select a different paper, I used Paper #1. Copy the paper, return to Template and Paste into Selection. Apply a drop shadow. Selections—Select None.
Select Shape 2 of your Template. Using your Magic Wand, click on the shape. Select a different paper. I used Paper #2. Copy the paper, return to Template and Paste into Selection. Apply a drop shadow. Selections—Select None.
Select Shape 3 of your Template. Using your Magic Wand, click on the shape. Select a different paper. I used Paper #4. Copy the paper, return to Template and Paste into Selection. Apply a drop shadow. Selections—Select None.
Open the snowman tube, or use one of your own. Using black background and X-out foreground in you color palette, select your text tool and find an easy to read font (such as Comic Sans), write “Welcome,” or whatever you would like on the snowman’s plaque he is holding. Selections—Select None. Go to the scrap kit elements and select the heart. Image—Resize to 30%. Image—Mirror. Edit—Copy. Return to the snowman tube and Edit—Paste as New Layer. Position heart over the left “arm” of the snowman (the one without the plaque). Zoom in on this area and using your Eraser Tool set at a small selection, erase the area of the back part of the ribbon on the heart, so that it appears the heart is on the snowman’s “arm.” Zoom out. Merge Visible. Image—Resize 90%. Edit—Copy.
Select your frame. I used Frame #2. Edit—Paste as New Layer (you are pasting the snowman). X-out the snowman layer and highlight the frame layer. Go to your Selection Tool—Rectangle and select an area starting just over the top of the bow. You want to make the rectangle wide enough to cover the entire frame and extend it down to below the bottom edge of the frame. Edit—Copy. Layer—New Raster Layer. Edit—Paste Into Selection (make sure you are on the New Raster layer). Make sure the New Raster Layer is on top. Open the snowman layer. Selections—Select None. Merge Visible. Image—Resize 75%. Edit—Copy.
Return to the Template. Edit—Paste as a New Layer. Add drop shadow.
Select elements from the scrap kit and resize appropriately. I used Buttons #5 & #6 and resized 20%. Place the buttons and/or elements where you like on the Template.
Using black as your background color and the foreground palette X out, put your copyright information in the bottom left corner, using the same font that you used for the snowman’s plaque. Merge—Visible.
In your color palette, select the blue from the darker of the papers for the foreground color, and white as the background color. Using Text Tool, select Krystal font, size 14, alignment centered, and type “Let it Snow!” Position text to your liking and add a drop shadow.
Save the image. Open Animation Shop.
Open the image in Animation Shop and Edit—Duplicate Selected until you have 10 frames. Edit—Select All.
Open My Snow from My Supplies. Edit—Select Al. Edit—Copy. Return to the snowman image, Edit—Propagate Paste, Edit—Paste—Into Selected Frame. Position snow evenly in the frame.
Go back to PSP and open a new image. Using the Krystal font, type your name, or whatever personalization you wish to make. Add a drop shadow. Selections—Select None. Edit—Copy. Return to Animation Shop.
Edit—Paste as New Animation. Edit—Copy. Return to original animation, Edit—Select All, Edit—Paste—Into Selected Frame.
View animation and adjust the speed of the snow if necessary (under Animation—Frame Properties—10) and check to make sure that it is set to loop (Animation—Animation Properties—Looping—Repeat Animation Indefinitely).


No comments:
Post a Comment